|
| Home | Holidays | Parsha | Tips | About us | | Contact us | © Lilmode B' Simcha | Contact Webmaster |
|
Click On Picture To Enlarge
Click on the text below
Click on pictures to enlarge
Aron Ha Kodesh
Cheruvim taken off Aron to show how cover is slightly recessed.
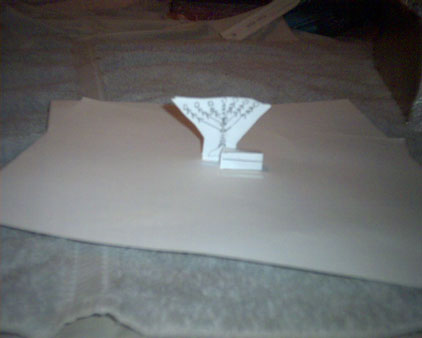
Menorah with steps slightly leaning on it.
Mizbach, notice tha position of poles
Shulchan, with diagram of Lechim Panim on it. |
|
Parshas Teruma Model Mishkan Material and Instructions: Have children bring in a tissue box, purchase gold spray paint (Walmart about 2 dollars), small scraps of fancy material (WalMart about a dollar a yard) 1 yard will make about 10 projects, and the use of glue. Instructions: Spray paint tissue box with gold paint, bottom neeed not be painted. Print out pages in the left column and photostat for each child. On the Menorah page, cut out objects along the black lines do not cut out the space between the branches of the Menorah, fold each of the tabs of the Menorahs outward and glue the Menorahs together back to back, the tabs enable the Menorahs to to stand upright, fold cut out the steps as one object and fold along the lines as instructed in the printout. The steps could be slightly leaned on the Menorah as shown in the pictures The Mizbach (Golden), should be cut out and folded as shown, The 2 very end pieces should be glued together. The top of the Mizbach should be cut out, the tabs that were folded down should be glued to the already put together base of the Mizbach, the horns should be flipped up.The poles are cut out separately and put not on the sides but on two of the corners midway up (see pic of Mizbach already built). In the page that shows the table, the table should be cut out in one piece with the flap for the top also included in that one piece. Folding and gluing is explained on the page.The poles are cut out individualy and glued along the long side even with line of the table before the racks of Lechem Panim, about a third of the way up (see pic of finished table). The aron page has two basic parts, the Cheruvim and the base of the aron. The angels are cut out along the outer black line , not between the wings etc. The tabs are folded outwards and the Cheruvim are glued back to back, the tabs enable them to stand up. The base of the aron is cut out and glued and folded as shown. The cover piece to the base is also cut out with the tabs folded upward. The rectangular part of the cover piece is placed in side the base of the Aron slightly lower than the crown like border that surrounds the top of the Aron. The tabs are glued to two of the inner sides of the aron right at the top, in other words, the cover for the ark is is hanging fron the two tabs slightly lower in the Aron (see pic of finished Aron without the Cheruvim). The Cheruvim are glued to the top of the completed base of the Aron, and the poles are glued midway up on the shorter sides of the Aron.A divider not given in the printouts must be cut out to fit the width of the childs tissue box, make the partition a little bigger than needed so the student can glue the edges to the wall of the box. Fancy cloth should be glued to the partition on both sides. The partition should be placed 2/3 towards the back of the box, Make sure your poles of the Aron can fit before glueing your partition! Also Glue fancy cloth to both sides of the front wall of your "Mishkan". See the pictures for help and call me if need be Leible at (518) 274-5572.
|
|||||||||||||||||||||||||||||||||||||||||||||


